
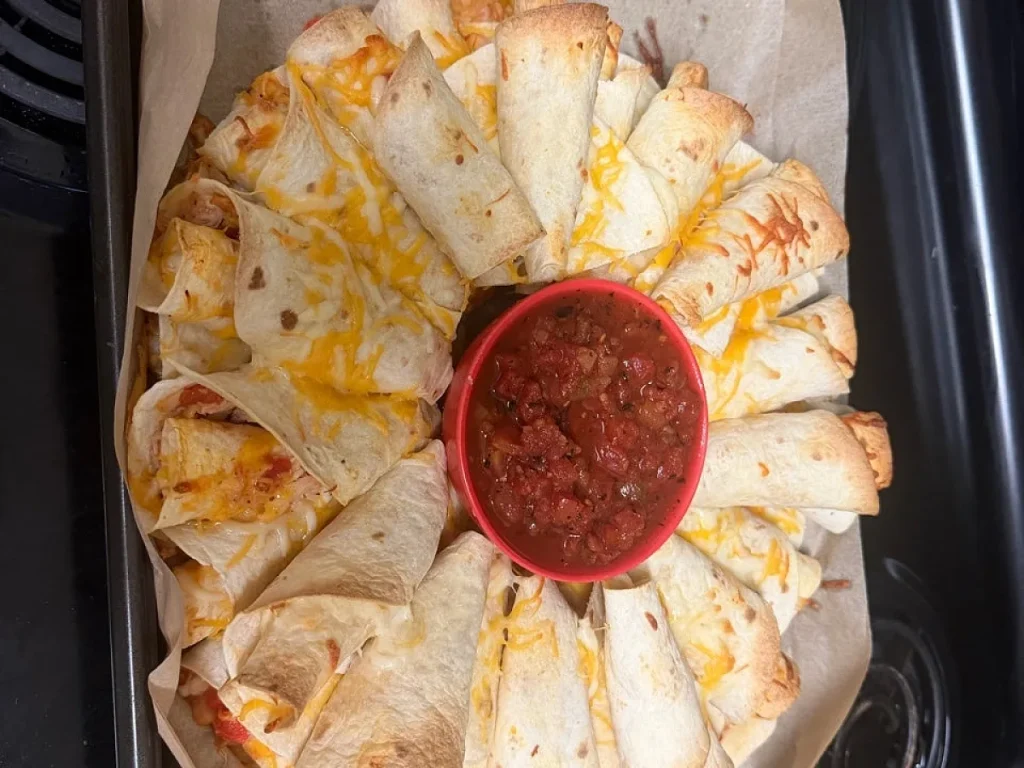
Twenty tortilla cones, one ring, and a pot of dip in the middle. That's the whole idea here. You fill each cone with chicken and two kinds of cheese, stand them in a circle, and bake until the edges go crisp.
It's built for a crowd. Twenty servings come out of one sheet pan, and people pull the cones off with their fingers instead of waiting for someone to cut anything. Leftover cooked chicken is the best thing to start with.
The one thing that goes wrong is a soggy ring. Too much sauce in the filling, or cones packed too tight, and the tortillas steam instead of toast. The steps below handle both.
Step-by-Step Instructions
1. Heat the oven
Set the oven to 375°F (190°C) and line a baking sheet with parchment paper. Let it preheat fully while you build the filling.
2. Mix the filling
Stir the shredded chicken, chopped onion, red bell pepper, jalapeño and taco sauce together in a large bowl. Taste a spoonful and add salt if it needs it.
3. Halve the tortillas
Cut every tortilla in half with a knife or kitchen scissors. You'll end up with 40 halves, which is exactly what the filling covers.
4. Fill each half
Spoon about 2 tablespoons of cheddar, 2 tablespoons of Monterey Jack and 2 tablespoons of the chicken mix onto each tortilla half. Keep the filling toward the middle so the edges stay clear.
5. Roll the cones
Roll each half from the cut side toward the rounded edge, pressing gently so nothing squeezes out. Set the finished cones aside as you go.
6. Set the center guide
Stand a wide-mouth jar or a glass in the middle of the lined pan. This is what keeps the ring round.
7. Build the first layer
Arrange about 13 cones in a circle around the jar, points facing in and resting against it. Scatter cheddar and Monterey Jack over the top of that layer.
8. Add the remaining layers
Repeat with the rest of the cones to make two more layers, finishing with whatever cheese is left. Lift the jar out of the middle.
9. Bake the ring
Bake for 15 to 20 minutes, until the cheese has melted and the tortilla edges are crisp and browned. Start checking at 15.
10. Serve it hot
Slide the ring onto a serving platter. Set a bowl of dip in the empty center, add any garnishes, and get it to the table while the cheese is still soft.
Tips & Tricks
- Set the oven to 375°F (190°C) and line a sheet pan with parchment. Give it a full ten minutes to come up to heat.
- A wide-mouth jar or a drinking glass in the middle of the pan is your guide. The cones lean on it while you build the ring, and you lift it out before baking.
- Two layers of cones plus a layer of cheese between them is what makes the ring hold together. Skip the cheese between layers and it falls apart when you move it.
- Move the finished ring to a platter with a wide spatula or a rimless sheet pan slid underneath. Lifting it by the edges of the parchment is how it ends up on the floor.
Variations
Beef version
swap the chicken for 3 cups of cooked ground beef, browned and drained first.
Vegetarian version
use 3 cups of drained black beans and corn in place of the chicken, and add a little extra cheese to bind it.
Milder ring
skip the jalapeño and use a mild taco sauce. The cheese and chicken still carry the flavor.
Extra-cheese ring
hold back half a cup of each cheese and scatter it over the top before baking for a crustier finish.
How to Store Blooming Quesadilla Ring
Refrigerator
Keep leftovers in a sealed container in the fridge for up to 3 days. The tortillas soften as they sit, so expect a softer texture on day two.
Freezer
Freeze baked cones on a tray until solid, then bag them for up to 2 months. Reheat from frozen rather than thawing, or they go limp.
Reheating
Reheat in a 350°F (175°C) oven for 8 to 10 minutes, or in an air fryer at 350°F for 4 to 5 minutes. A microwave works but the tortilla turns chewy.
Frequently Asked Questions
Q: Can I make a blooming quesadilla ring ahead of time?
Yes. Build the ring on the parchment-lined pan, cover it loosely, and refrigerate for up to a day. Add 3 to 5 minutes to the bake time since it starts cold. Don't assemble it more than a day ahead, or the tortillas soak up the sauce.
Q: Why did my tortillas come out soggy?
Usually too much liquid in the filling. Taco sauce is thin, salsa is thinner, and any juice from the chicken adds more. Drain the filling in a strainer for a few minutes before you fill the cones, and don't crowd them together on the pan.
Q: What can I use instead of taco sauce?
Enchilada sauce is the closest match in texture. If you're using salsa, strain it first. Tomato paste thinned with a splash of water also works in a pinch.
Q: How do I know the chicken is cooked safely?
Use an instant-read thermometer in the thickest part. It needs to read 165°F (74°C). Color alone won't tell you, especially with dark meat.
Q: What dip goes in the middle?
Sour cream, guacamole, salsa, or a warm cheese dip all work. Keep it in a small bowl so it doesn't leak under the cones.
Q: Can I bake this in an air fryer?
Not as one big ring. The pan won't fit in most baskets. Bake the cones in batches in a single layer at 350°F for 6 to 8 minutes, then stack them on a platter.
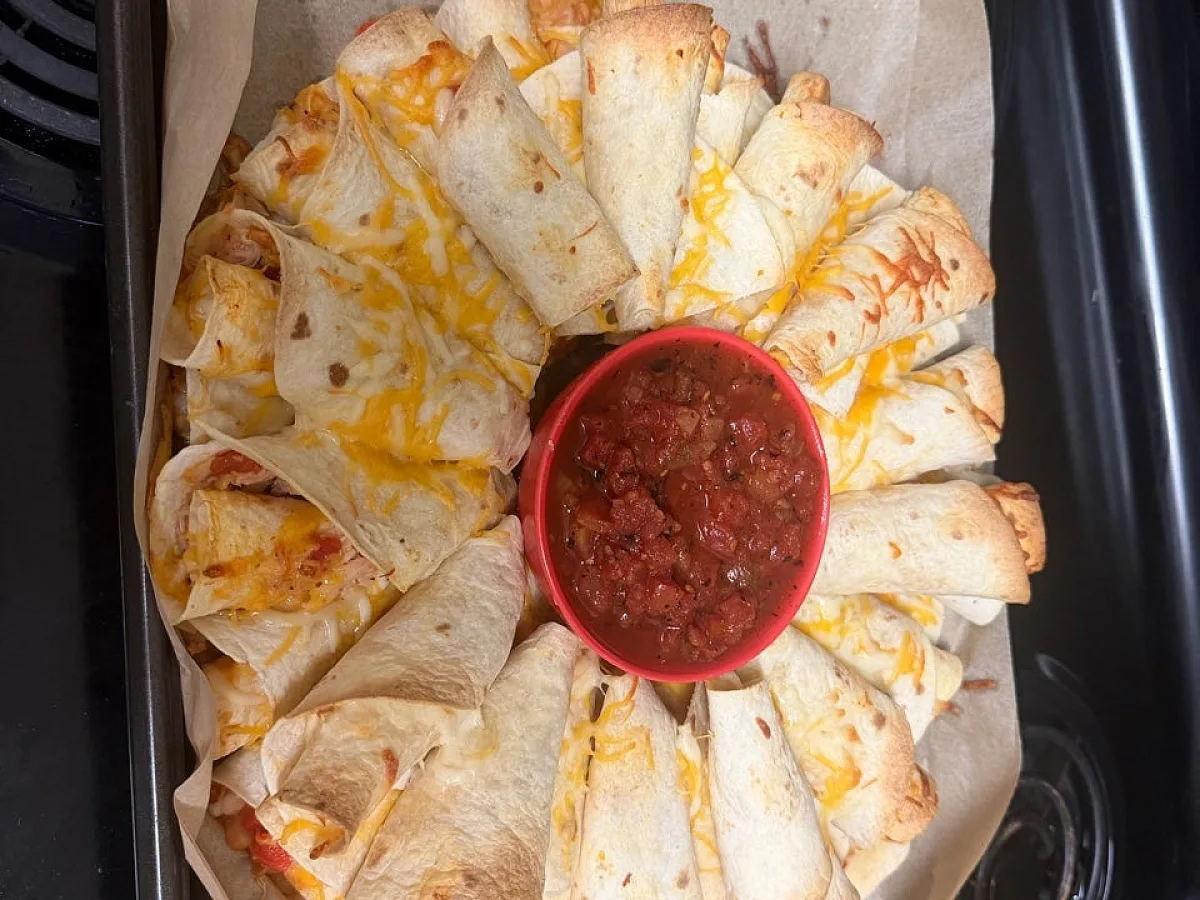
Blooming Quesadilla Ring: Baked Chicken Appetizer
A blooming quesadilla ring turns 20 tortilla cones of shredded chicken, cheddar and Monterey Jack into a pull-apart baked appetizer for a crowd.
Ingredients
Instructions
- 1Heat the oven — Set the oven to 375°F (190°C) and line a baking sheet with parchment paper. Let it preheat fully while you build the filling.
- 2Mix the filling — Stir the shredded chicken, chopped onion, red bell pepper, jalapeño and taco sauce together in a large bowl. Taste a spoonful and add salt if it needs it.
- 3Halve the tortillas — Cut every tortilla in half with a knife or kitchen scissors. You'll end up with 40 halves, which is exactly what the filling covers.
- 4Fill each half — Spoon about 2 tablespoons of cheddar, 2 tablespoons of Monterey Jack and 2 tablespoons of the chicken mix onto each tortilla half. Keep the filling toward the middle so the edges stay clear.
- 5Roll the cones — Roll each half from the cut side toward the rounded edge, pressing gently so nothing squeezes out. Set the finished cones aside as you go.
- 6Set the center guide — Stand a wide-mouth jar or a glass in the middle of the lined pan. This is what keeps the ring round.
- 7Build the first layer — Arrange about 13 cones in a circle around the jar, points facing in and resting against it. Scatter cheddar and Monterey Jack over the top of that layer.
- 8Add the remaining layers — Repeat with the rest of the cones to make two more layers, finishing with whatever cheese is left. Lift the jar out of the middle.
- 9Bake the ring — Bake for 15 to 20 minutes, until the cheese has melted and the tortilla edges are crisp and browned. Start checking at 15.
- 10Serve it hot — Slide the ring onto a serving platter. Set a bowl of dip in the empty center, add any garnishes, and get it to the table while the cheese is still soft.

Darnell covers air fryer recipes and slow cook meals, with a steady side of eggs and breakfast casseroles for people cooking on a tight schedule. He writes in a blunt, test-it-again voice and flags the mistakes that ruin texture, from soggy fries to rubbery eggs. Every post gives timings, temperatures, and a fallback if your machine runs hot.
Questions or cooking notes?
Ask about an ingredient or share a tip that could help someone else.